How often should Homeowners clean appliances?

Proper appliance hygiene is essential for keeping your home or office running smoothly. Cleaning and sanitizing appliances regularly can enhance performance and helps avoid appliance repair, improve sanitation levels, and prevent potential breakdowns. 

What is the best way to clean your appliances? 

Join us as we break down when and how often you should clean yours!

Clean Your Dishwasher

To begin with, the frequency at which appliances are cleaned depends on their usage. For example, dishwashers should be cleaned at least once a month to prevent the buildup of sediments and food particles, which may cause clogs and unnecessary appliance repair. 

•Start by removing any food scraps from the dishwasher filter. 

•Then, run the dishwasher on a hot cycle with a cup of vinegar on the top rack. 

•The vinegar will help to remove any buildup and eliminate any odors. 

•Once complete, wipe down the dishwasher's interior with a clean cloth.
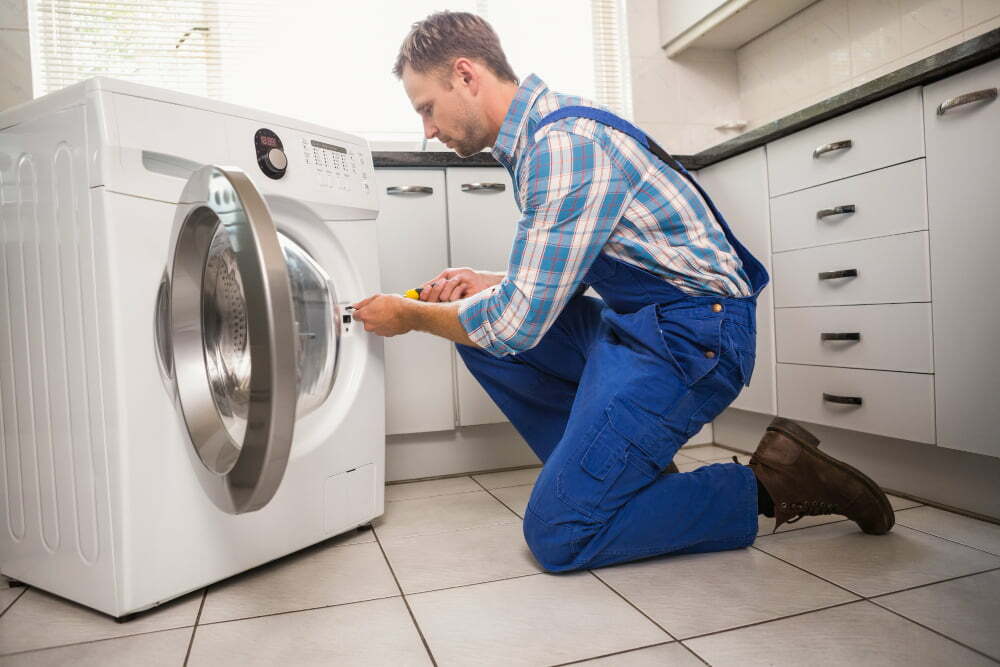
Clean your Dryer

Similarly, dryers should be cleaned at least twice a year, or more often if used frequently, to prevent the accumulation of lint and dust that could cause fires.

•Remove the lint screen and clean it with warm, soapy water. •Use a vacuum cleaner to clean around the lint screen area. 

•Then, use a flexible dryer vent brush to clean the vent hose. 

•Finally, vacuum out the exhaust vent outside the house.

4 1
How Often Should Homeowners Clean Appliances? 4

Clean your microwave

Microwaves should be cleaned at least once a week, or more often depending on their usage, to prevent food and grease stains accumulation.

•Start by removing the oven grates and soaking them in warm, soapy water. 

•Then, using a suitable oven cleaner, spray the oven inside and let it sit for the recommended time.

•Wipe the oven with a damp cloth once the time is up. 

•Remember to clean around the oven door and the oven knobs as well. 

•Finally, replace the grates, and you're done!

Clean your washing machine

On the other hand, washing machines should be cleaned after every load. It is to prevent the growth of bacteria and mold, which may accumulate in the machine's damp and dark areas, cause unpleasant odors in clothes, and eventually require appliance repair service.

To clean your washing machine:

•Clean the detergent dispenser and the drum with warm water and vinegar.

•Run the washing machine on a hot cycle with a cup of baking soda. It will help to remove any buildup and eliminate any odors.

•Once the cycle is complete, wipe down the washing machine's interior with a clean cloth.

Clean your Commercial Fridge

Commercial refrigerators, often used in restaurants and food establishments, require more frequent cleaning, at least once a week, as they store perishable items and are susceptible to bacteria buildup.

•Start by removing all the food and drinks from the fridge. 

•Throw away any expired or spoiled items. 

•Wipe down all the shelves, racks, and drawers using warm water and mild soap. 

•Remember to clean the door seals, which can harbor bacteria. 

•Once you've cleaned everything, dry it off with a clean cloth and put everything back where it belongs.

It is essential to note that proper cleaning of household appliances not only ensures optimal functioning but also promotes a healthy and hygienic living environment. 

Who Are We?

Trusted Home Improvement Service in British Columbia

At Speedy Appliance Repair, we offer practical, real-life tips and inspiration to help you make your best home. From troubleshooting common issues of appliance advice to a simple guide to fridge repair and replacement, our experienced team can show you. 

We have been in business for a long while and have serviced thousands of customers. 

We also offer a money-back satisfaction guarantee so you can be sure you will be happy with 

our service.

In case you need any assistance with your appliance repair costs, Let our technician help you. 

Call at (604) 446-9526.

Why Is My Dryer Not Getting Hot Or Drying Properly?

Have you noticed that your clothes are still damp after running them through the dryer? Or perhaps you've noticed that the dryer isn't getting hot anymore. These are common problems that homeowners face with their dryers.

There could be several reasons why your dryer is not getting hot or drying properly, and we will discuss the most common dryer repairs needed in this blog post.

What Are The Reasons Dryer Isn't Bringing Optimum Results?

Dirty Lint Screen –

A dirty lint screen is one of the most common reasons for a dryer not getting hot or drying properly. A lint screen blocked by lint can increase the drying time of your appliance.

This is because the dryer has to work harder to circulate hot air through the drum to dry your clothes. It's necessary to clean the lint screen after every use to prevent buildup. A contaminated lint screen can also lead to fire hazards, so it's essential to keep it clean.

Crushed or Obstructed House Vent –

Another reason your dryer may need to dry properly is a crushed or obstructed house vent. The vent from your dryer to the outside of your home can become blocked with lint, debris, or bird nests.

If the vent is obstructed, the hot air from the dryer cannot escape, and your clothes will not dry. Sometimes, the vent may even become crushed, further limiting airflow. It's important to have a professional inspect your vent regularly to prevent this from happening.

Lack of Power –

If your dryer isn't getting hot or drying properly, it could be due to a lack of power. Check to ensure the dryer is properly plugged in and the circuit breaker hasn't tripped. You may need to replace the outlet or the cord if it is damaged or faulty. If you need help with this, it's best to contact a professional.

Electric Dryers: These types of dryers require a 240-volt connection to function properly. If the power supply is lower than this, it will not be able to provide enough energy to operate the unit. Consult a qualified electrician to check if your wall outlet supplies sufficient voltage.

Gas Dryers: These dryers need to be connected to a gas supply, which is done through a valve. Ensure the handle is in line with the gas pipe when open. If not, the drum will turn, but no heat will be generated. Refer to your owner's manual for instructions on ensuring your appliance receives power.

Load Size is Too Large –

Another common reason your dryer may need to dry properly is if the load size is too large. Try reducing the load size and see if that helps. If you overload the dryer, it can't circulate hot air properly, and your clothes will take longer to dry.

3 2
Why Is My Dryer Not Getting Hot Or Drying Properly? 6

Soaking Wet Clothes –

If your dresses are dripping wet when you put them in the dryer, they will take longer to dry. It's important to wring out excess water before putting them in the dryer. You can also use a high-speed spin cycle on your washing machine to remove excess water.

Before placing wet items in the dryer, feel them with your hands to determine if they are too damp. If that is the case, put the clothes into a washer and run a spin or drain and spin cycle to eliminate any extra water. For rags, towels, or swimsuits, either wring them out manually or use a washer spin cycle to rid the objects of any excess liquid.

·         This way, you can be sure they will dry quickly and evenly in the dryer.

·         This process will also help prevent any damage or shrinkage in the dryer.

·         Taking the extra time to check and remove excess water from your clothing will result in fresher and longer-lasting clothing.

Heating Elements –

The heating element is accountable for warming the air circulating through the drum. If it's not working correctly, drying your clothes will take longer. If your dryer isn't getting hot, it could be due to a faulty heating element. A professional can replace the heating element if necessary.

Blown Thermal Fuse –

Finally, a blown thermal fuse could be the culprit if your dryer isn't getting hot or drying properly. The thermal fuse is a security device that shuts off the dryer if it overheats. If the fuse is blown, your dryer won't heat up. A professional can replace the thermal fuse if necessary.

In conclusion, there could be several reasons why your dryer isn't getting hot or drying properly. Some of the most common ones include a dirty lint screen, a crushed or obstructed house vent, lack of power, load size that is too large, soaking wet clothes, faulty heating elements, and a blown thermal fuse.By checking these common dryer repair issues, you can determine what's causing the problem and take the necessary steps to fix it. If you need help selecting the topic or feel uncomfortable doing it yourself, it's best to contact a professional. Speedy Appliance Repair is one of the names you can count on for assistance.

Why Does My Dryer Come on But Won't Start?

There's nothing more frustrating than trying to start your dryer only to find that it doesn't cooperate. If your dryer turns on but won't start spinning, several different issues could be at play. For starters, it could be a problem with the door switch or thermal fuse. Alternatively, the belt that connects to the motor may have become loose or broken. Before you start tearing apart your dryer, it's important to assess the situation and determine the cause of the problem. You can diagnose the issue with some troubleshooting and get your laundry routine back on track in no time.

Overview of Dryer Repair - Common Issues and Causes of Breakdowns 

Regarding dryer repair, a few common issues crop up occasionally. As mentioned earlier, the door switch or thermal fuse may be faulty, forcing your machine to turn on but not start spinning. Alternatively, the drive belt could have become loose or worn out over time, making it impossible for the engine to start. In some cases, the motor itself may have gone bad, resulting in a lack of power and an inability to turn on. Other issues that can cause your dryer to malfunction include clogged lint filters, blocked exhaust vents, and faulty heating elements.

Identifying the Problem - How to Diagnose Your Dryer Issues

To diagnose the problem with your dryer, you should start by assessing the situation:

  1. Check if the door switch or thermal fuse is faulty. If so, you may need to replace these components to get your machine working again.
  2. Inspect the drive belt and ensure it is not loose or worn out. If the belt is damaged, replace it before turning on your dryer.
  3. Ensure all the lint filters are clean and the exhaust vent is not blocked.

By thoroughly inspecting these components, you can identify any potential dryer repair issues with your machine and get it up and running again in no time.

How Do I Reset My Dryer That Won't Start?

If your dryer turns on but won't start spinning, it's likely due to an issue with the door switch. If this is the case, you can easily reset your dryer by pressing and holding the 'Start/Pause' button for a few seconds. This step should reset the door switch and let your dryer start spinning again. If the issue isn't resolved, then you may need to check the thermal fuse and door switch for any signs of damage.

What Can Cause My Dryer Not To Start?

Several possible causes can prevent your dryer from starting. Common culprits include a faulty door switch, a loose or broken belt, or a damaged thermal fuse. If the door switch is to blame, it can be easily reset by pressing and holding the 'Start/Pause' button. However, if the belt has become loose or broken, you must replace it before your dryer starts spinning again. In addition, a faulty thermal fuse needs to be returned to restore power to the dryer.

How Do I Troubleshoot My Dryer That Won't Start?

Before attempting dryer repairs, you'll need to troubleshoot the cause of your dryer's malfunction. First, check all connections and ensure the power cord is plugged in securely. If everything appears to be in order, you can check the door switch for signs of damage. You'll need to replace it if it's faulty or broken. Additionally, inspect the belt and thermal fuse for any visible issues such as wear and tear or discoloration.

What Causes a Dryer to Stop Turning?

If your dryer turns on but won't start spinning, several causes could be at play. First and foremost, the door switch may have become faulty or broken. This step can be easily checked by pressing and holding the 'Start/Pause' button to reset it. Furthermore, a loose or broken belt connecting the motor to the drum can prevent your dryer from spinning. Finally, a damaged thermal fuse can also cause your dryer to stop. In this case, you'll need to replace the thermal fuse before it starts functioning properly again.

2 1
Why Does My Dryer Come On But Won't Start? 8

How Do I Reset My Dryer?

If your dryer turns on but fails to start spinning, it's likely due to an issue with the door switch. Hold the 'Start/Pause' button to reset the dryer for a few seconds. This step should reset the door switch and allow you to resume your laundry routine without further troubleshooting. However, if the issue persists, then you'll need to inspect the belt and thermal fuse for any signs of damage.

Conclusion

By following these steps, you can diagnose and troubleshoot the most common dryer repair issues that can cause your dryer to malfunction. Start by checking the door switch and thermal fuse for any damage or wear, inspect the belt for signs of wear or injury, and ensure all lint filters are clean. If any of these components appear faulty, they must be replaced. Finally, if your dryer still doesn't start, you can reset it by pressing and holding the 'Start/Pause' button for a few seconds. With these simple dryer repair steps, you should be able to get your dryer up and running in no time!

Simple Guide To Commercial Fridge Repair

Having a broken commercial fridge can be extremely frustrating for any business, particularly restaurants and grocery stores. Not only does it make food storage much more difficult, but many businesses depend on the functioning of their fridges to ensure that health regulations are met.

 To help avoid costly commercial fridge repair in the future, here are some tips and advice on how to repair your commercial fridge and keep it running at optimal efficiency.

Step 1 - Identify the parts which are prone to damage and need repairs

  1. Door Gasket

This part of the fridge seals the door and keeps it airtight. Over time, this gasket can become worn out or damaged, leading to air leaks and higher energy bills.

  1. Compressor

The compressor helps regulate the temperature in your refrigerator and freezer by circulating coolant throughout the unit. It may become faulty over time, leading to temperature fluctuations. Therefore call for commercial fridge repair as soon as you detect a problem with this refrigerator part. 

  1. Thermostat

The thermostat is responsible for the correct temperature settings in the refrigerator and freezer. If it becomes defective, you may experience problems with energy efficiency or inaccurate readings.

  1. Condenser Coils

These coils are found at the back of your fridge and help to dissipate heat. If these become clogged with dust or dirt, this can decrease the unit's efficiency and lead to overheating.

  1. Fan Motor

The fan motor is responsible for circulating air through the fridge. If it becomes faulty, this can cause temperature fluctuations and other issues.

Step 2 - Inspect Your Fridge For Problems

  1. Leaky refrigerator

A worn-out door gasket or cracked condenser coils usually cause a leaky refrigerator. To inspect these parts, unplug the fridge and remove any food items. Once the unit is empty, use a flashlight to check for cracks in the door gasket and any buildup of dust or dirt on the coils.

  1. Fluid in the food compartment

Water in the food compartment can occur if the compressor malfunctions and leaks coolant. This needs to be inspected and repaired as soon as possible, as it could lead to further damage and temperature fluctuations.

  1. Inaccurate thermostat readings

If your fridge's internal temperature isn't accurate, you'll need to check the thermostat. You must call for commercial fridge repair if it's not working correctly.

  1. Unwanted ice frost in the freezer

If you find unwanted ice frost in your freezer, this is usually caused by a buildup of thin layers of frost on the evaporator coils or the fan motor. This can occur due to improper temperature settings or faulty components.

  1. Strange noises coming from the freezer

A faulty compressor or fan motor can cause strange noises coming from the freezer. 

  1. The refrigerator isn't cooling

The refrigerator not cooling could be caused by a faulty thermostat, compressor, or condenser coil. Make sure to inspect these components and replace them if necessary. In addition, check the door seal to ensure it's airtight and that no cool air is escaping.

  1. Refrigerator stopped working

If your refrigerator suddenly stops working, it could be due to a power outage or an issue with the compressor. Check the circuit breakers, wiring, and fuses to ensure they all work correctly. If these don't solve the problem, you may need to go for commercial fridge repair.

6
Simple Guide To Commercial Fridge Repair 10
  1. The compressor is too hot

The compressor can become too hot for various reasons, such as improper air circulation, low refrigerant levels, or a faulty fan motor. It's important to have your refrigerator inspected by a professional to identify the cause and repair any issues.

  1. Condensation on the fridge door

Condensation on the fridge door is a common problem caused by high humidity levels, an insufficient seal around the door, or excessive temperature fluctuations. Thus, the best way to resolve this issue is to have a proper seal around the fridge door set to the correct temperature.

  1. Defrost drain problem

A defrost drain problem occurs when the water from melting ice accumulates in the fridge instead of draining away. This can be caused by a clogged or blocked defrost drain and should be checked and repaired as soon as possible to prevent any further issues.

  1. The fridge ice maker doesn't work

If the fridge ice maker isn't working, it could be due to a few issues. These include a broken water line, faulty wiring, or blocked valves. Therefore, a professional inspecting and repairing your refrigerator is important to troubleshoot any issues and get your ice maker working again.

Step 3 - Gather Necessary Tools and Supplies

When it comes to commercial fridge repair, there are a few tools and supplies that you will need to complete the job:

- Screwdriver set

- Electric drill

- Pliers

- Wrench set

- Refrigeration sealant/caulk

- Vacuum cleaner

- Replacement parts (such as gaskets, motors, and more)

Step 4 - Disconnect the power source before beginning any repairs

 Disconnecting helps ensure your safety and prevent further damage to the fridge.

Step 5 - Investigate and access components such as door seals or fan motors that may be causing the issue 

Once the power is disconnected from the unit, you can investigate and access components such as door seals or fan motors.

Step 6 - Replace any faulty parts and reassemble the refrigerator

Once you've identified any faulty parts, it is time to replace them with new ones.

Step 7 - Follow proper procedure when reassembling parts after the repair is complete

When you finish the repair, it is important to follow the instructions in the manual and reassemble correctly.

Step 8 - Test out your repair work to make sure all components are functioning properly

Before you put your fridge back into operation, ensuring all components function is important. Test the temperature settings to ensure they are correct and everything is in working order. These steps will help you commercial fridge repair successfully, saving time, energy, and money. Regular maintenance and repairs are important to ensure your unit's optimal performance, so follow this guide and take care of your fridge!